I’ve found and download a few free but beautiful textures and models in the Quixel Bridge, when I imported them to the Keyshot, I found it does not look precise and beautiful as it works or shows in the Quixel Bridge, the following are the comparison of them.
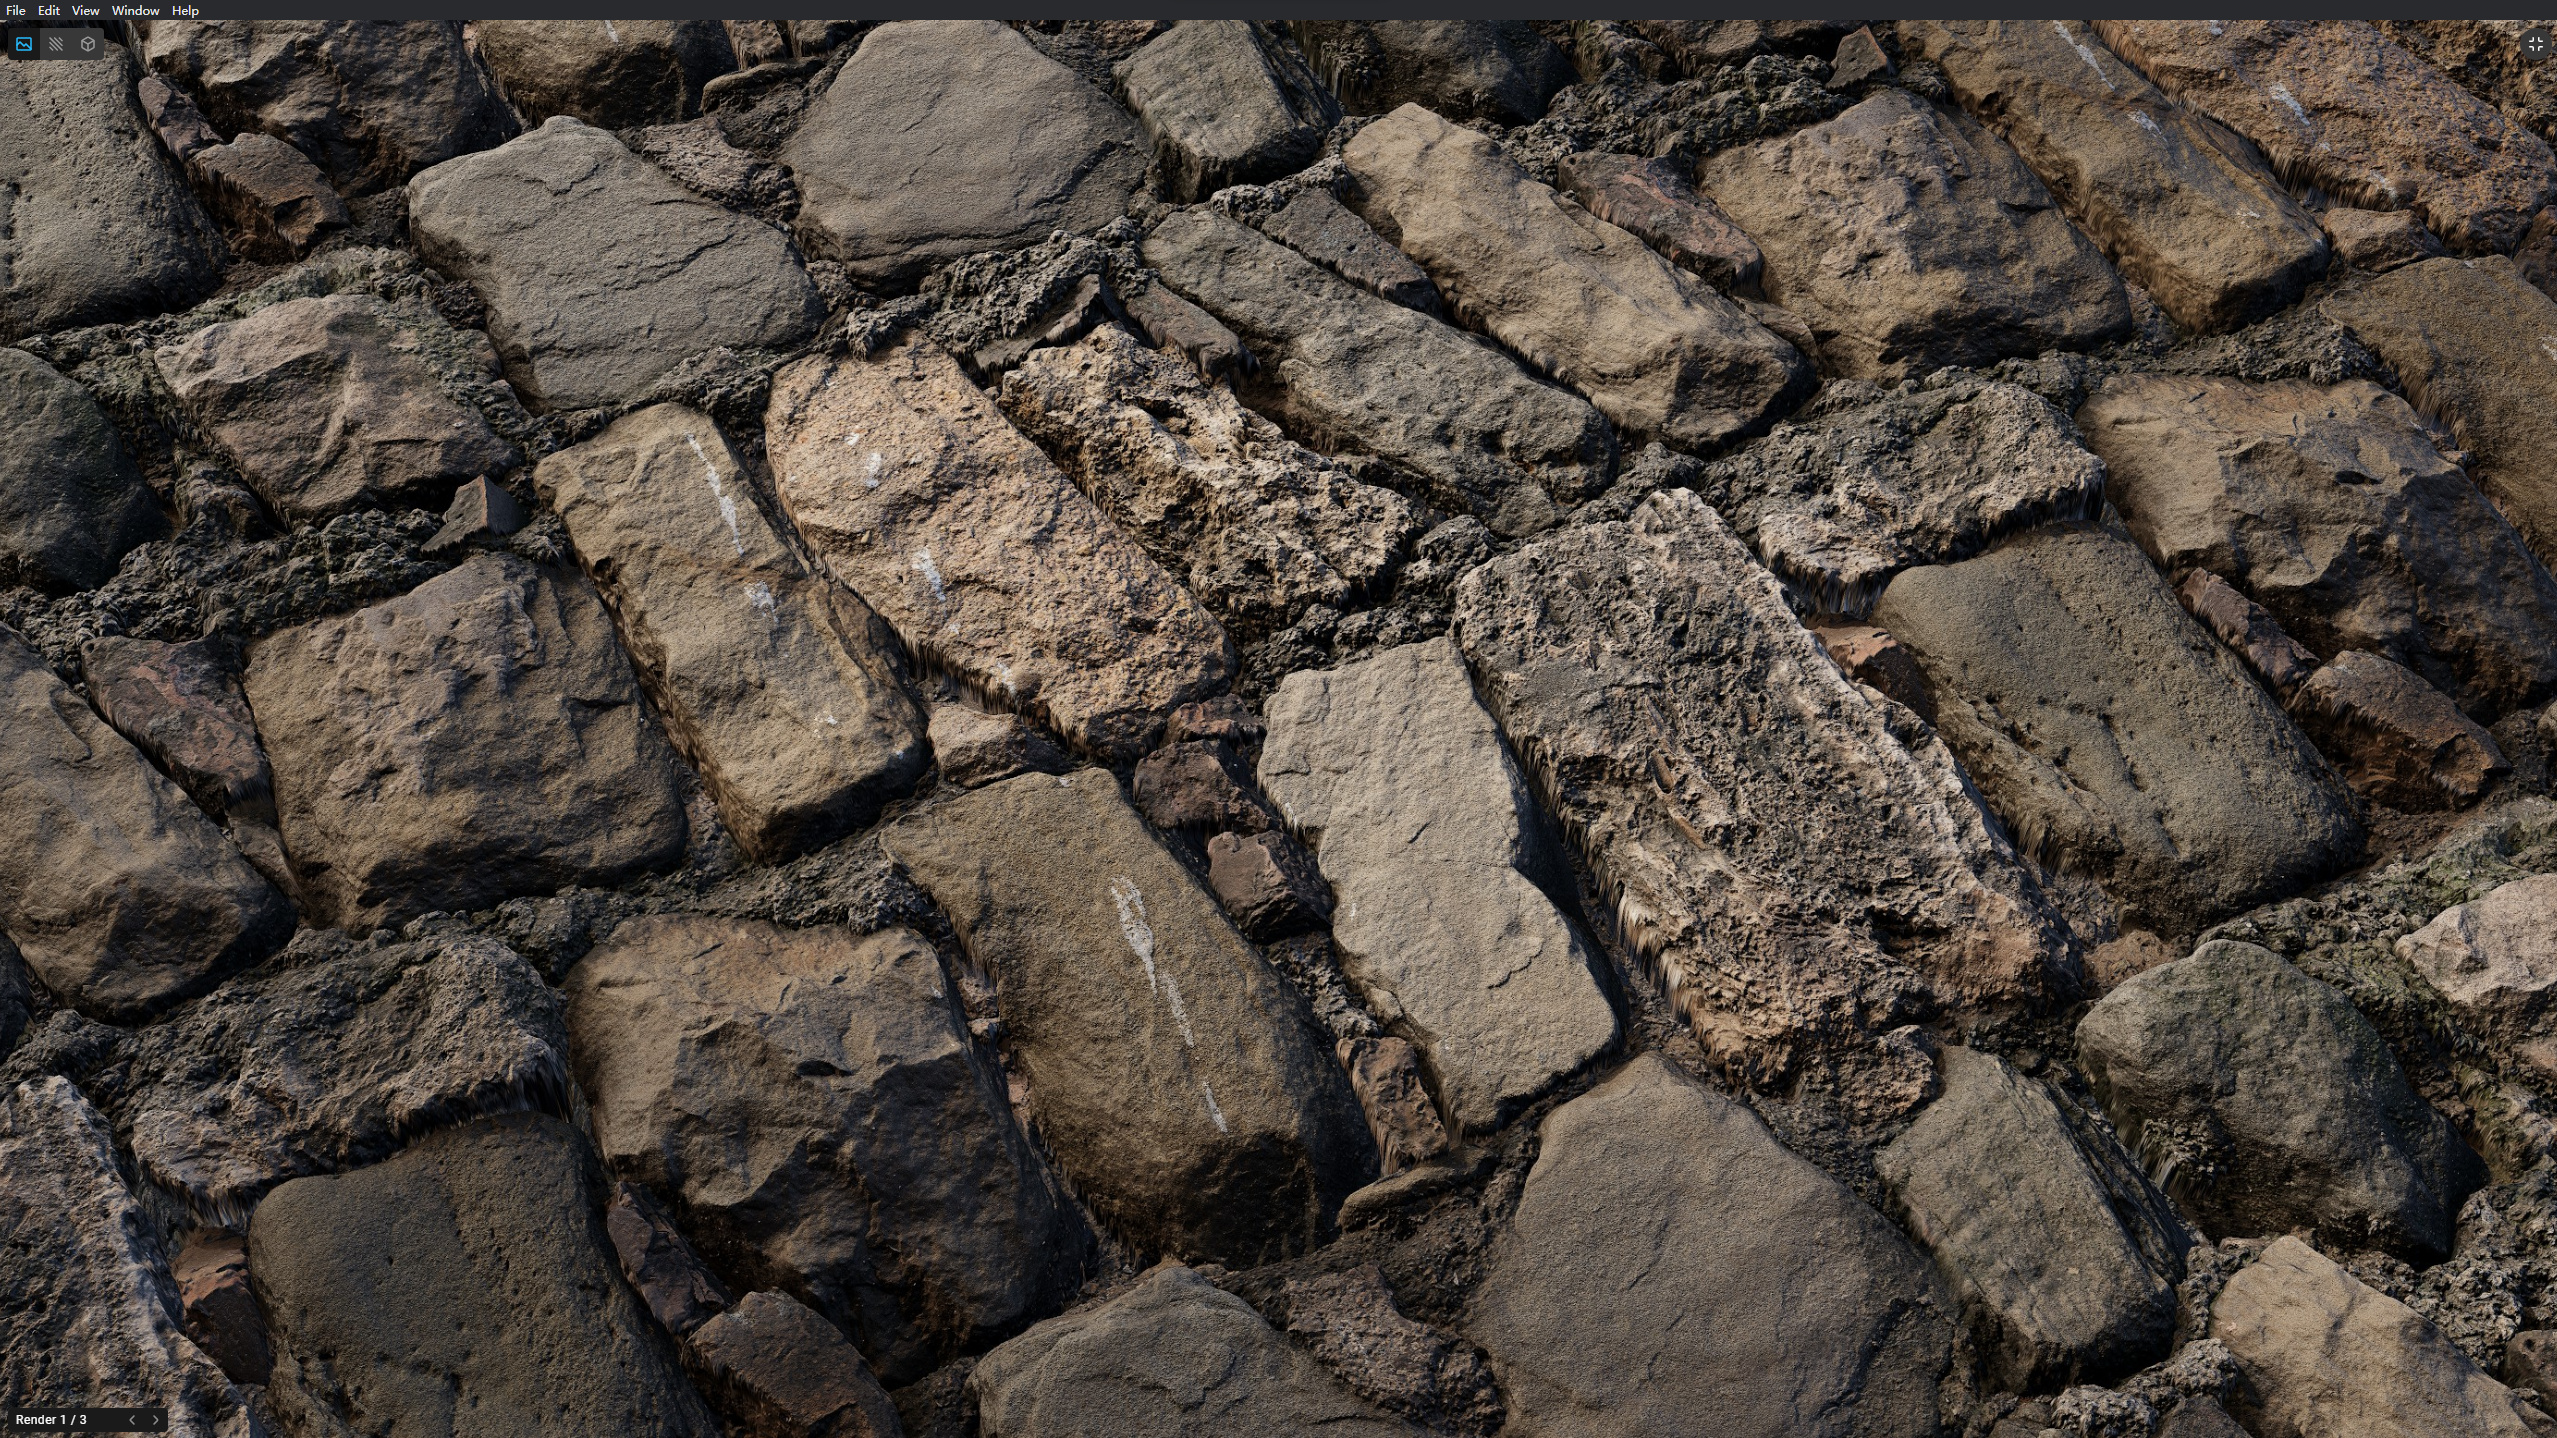
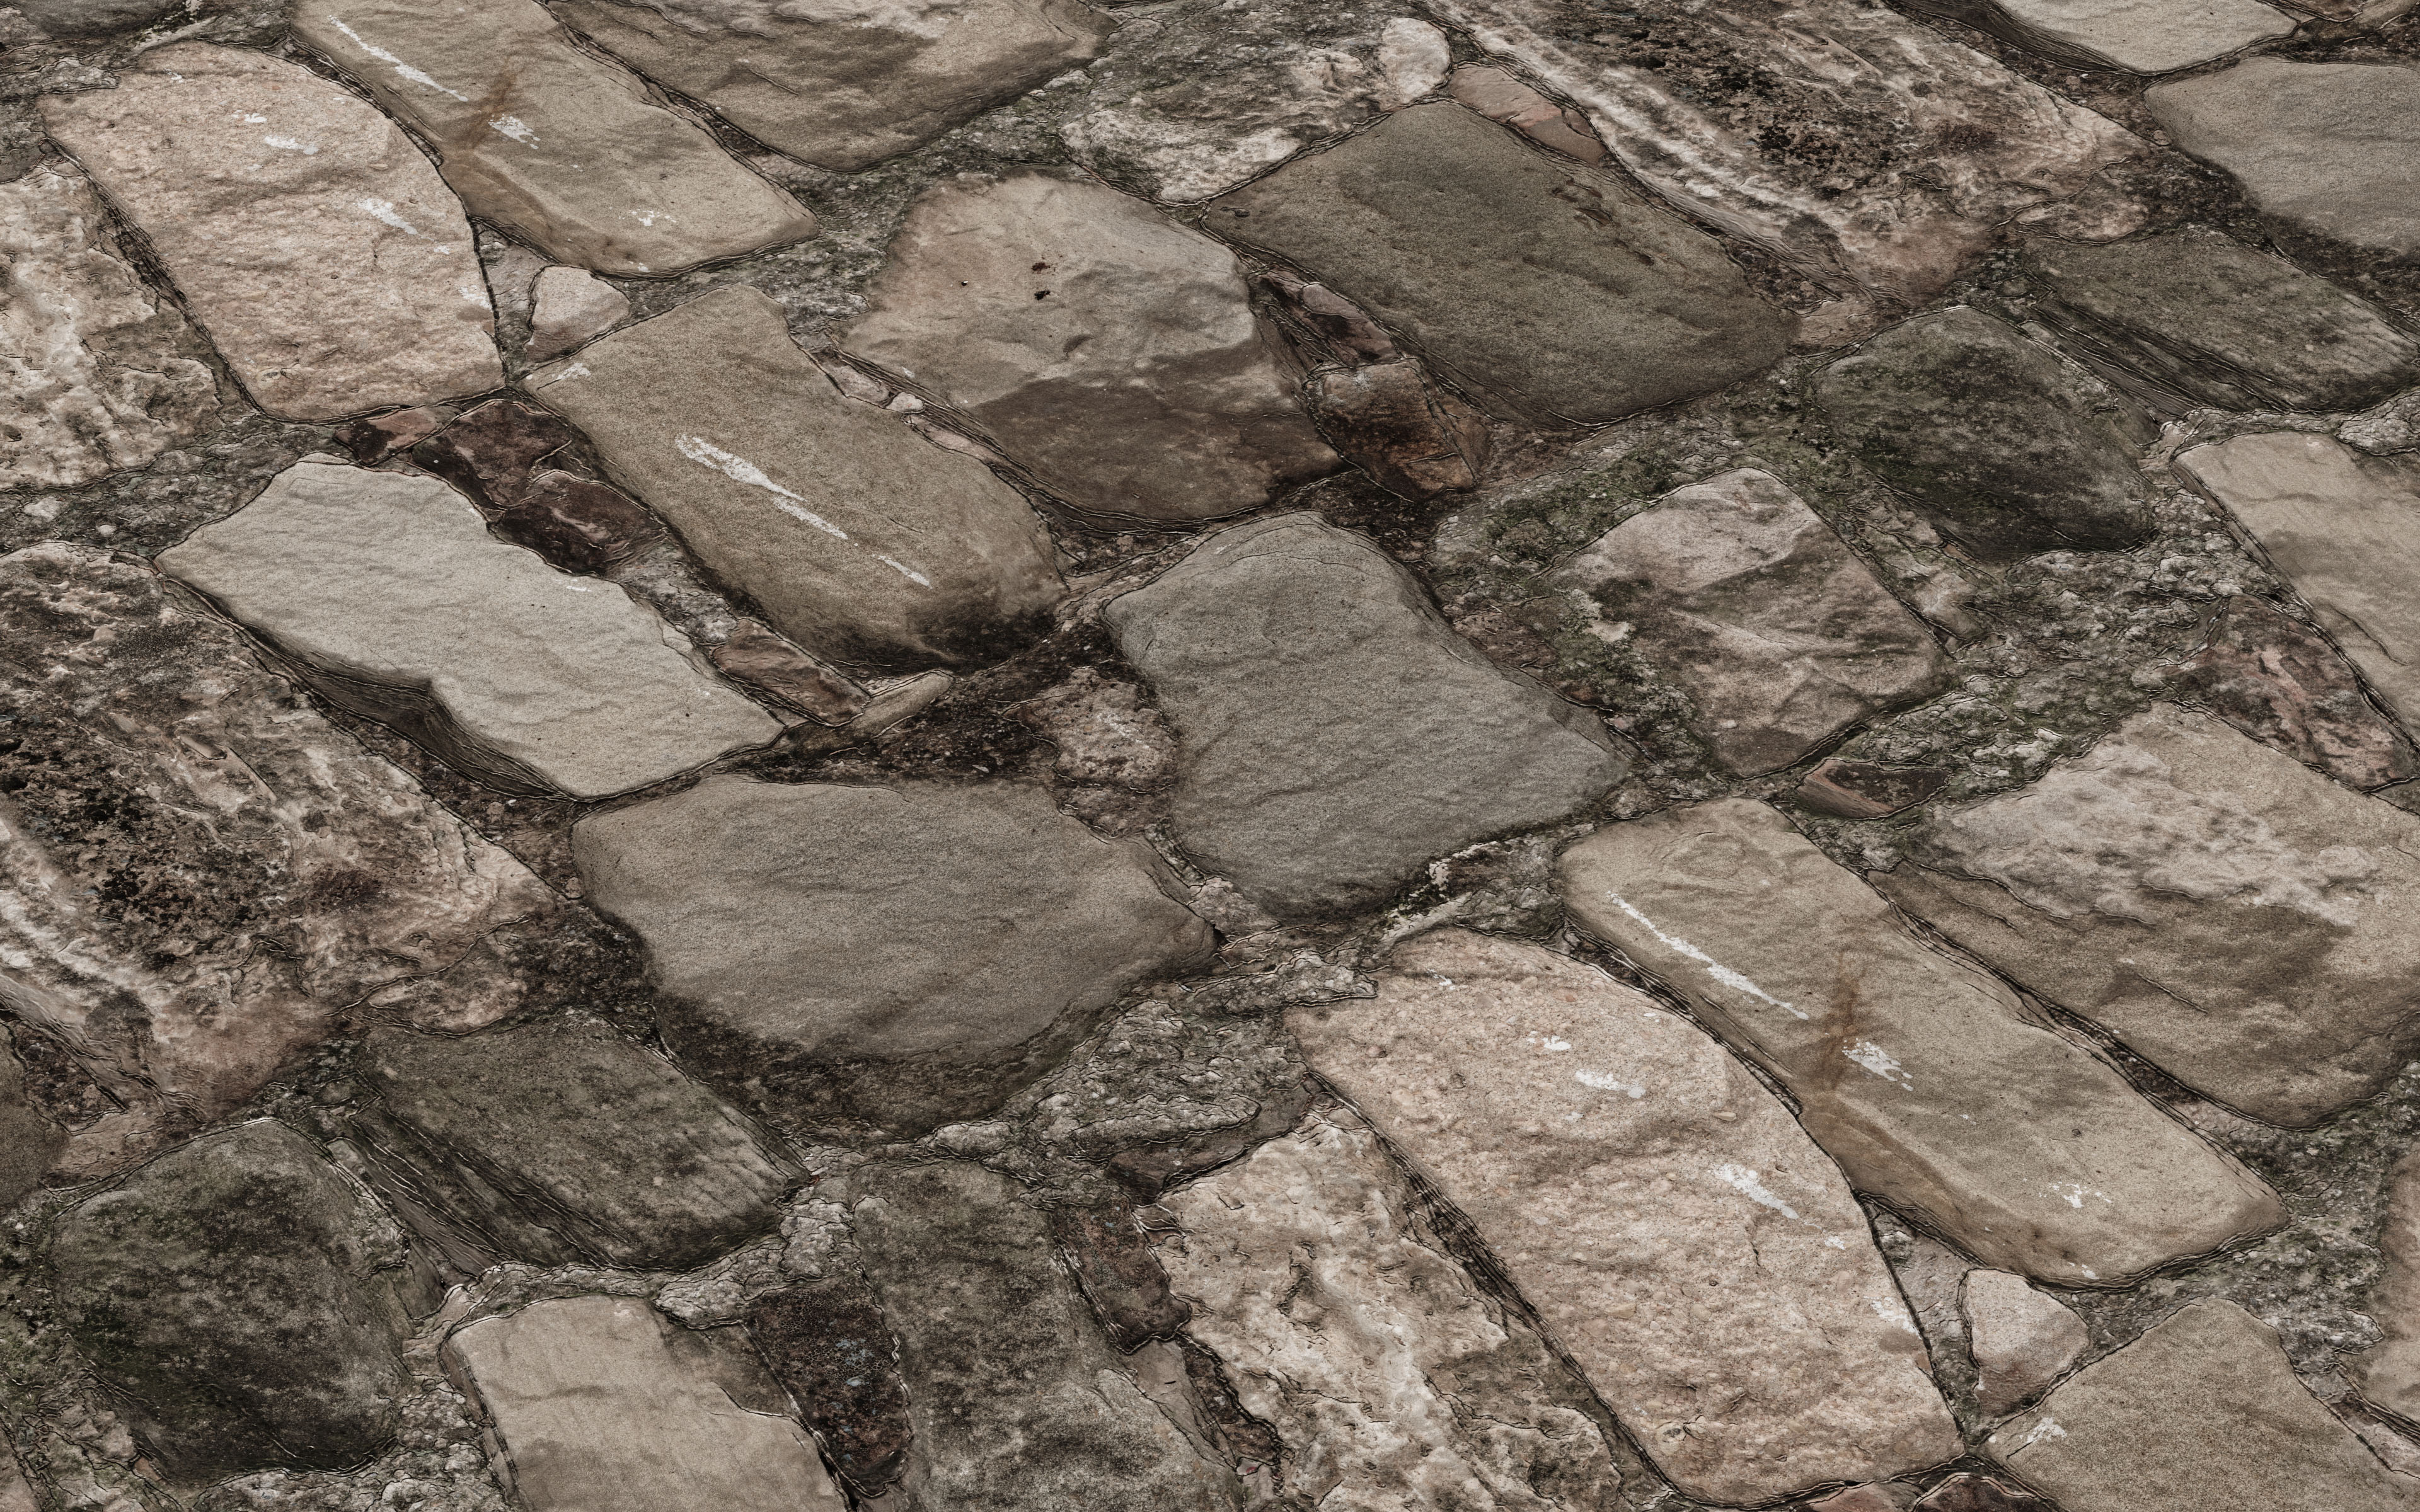
Here is the render in the Quixel Bridge which I think it is rendered by Unreal Engine, it looks beautiful
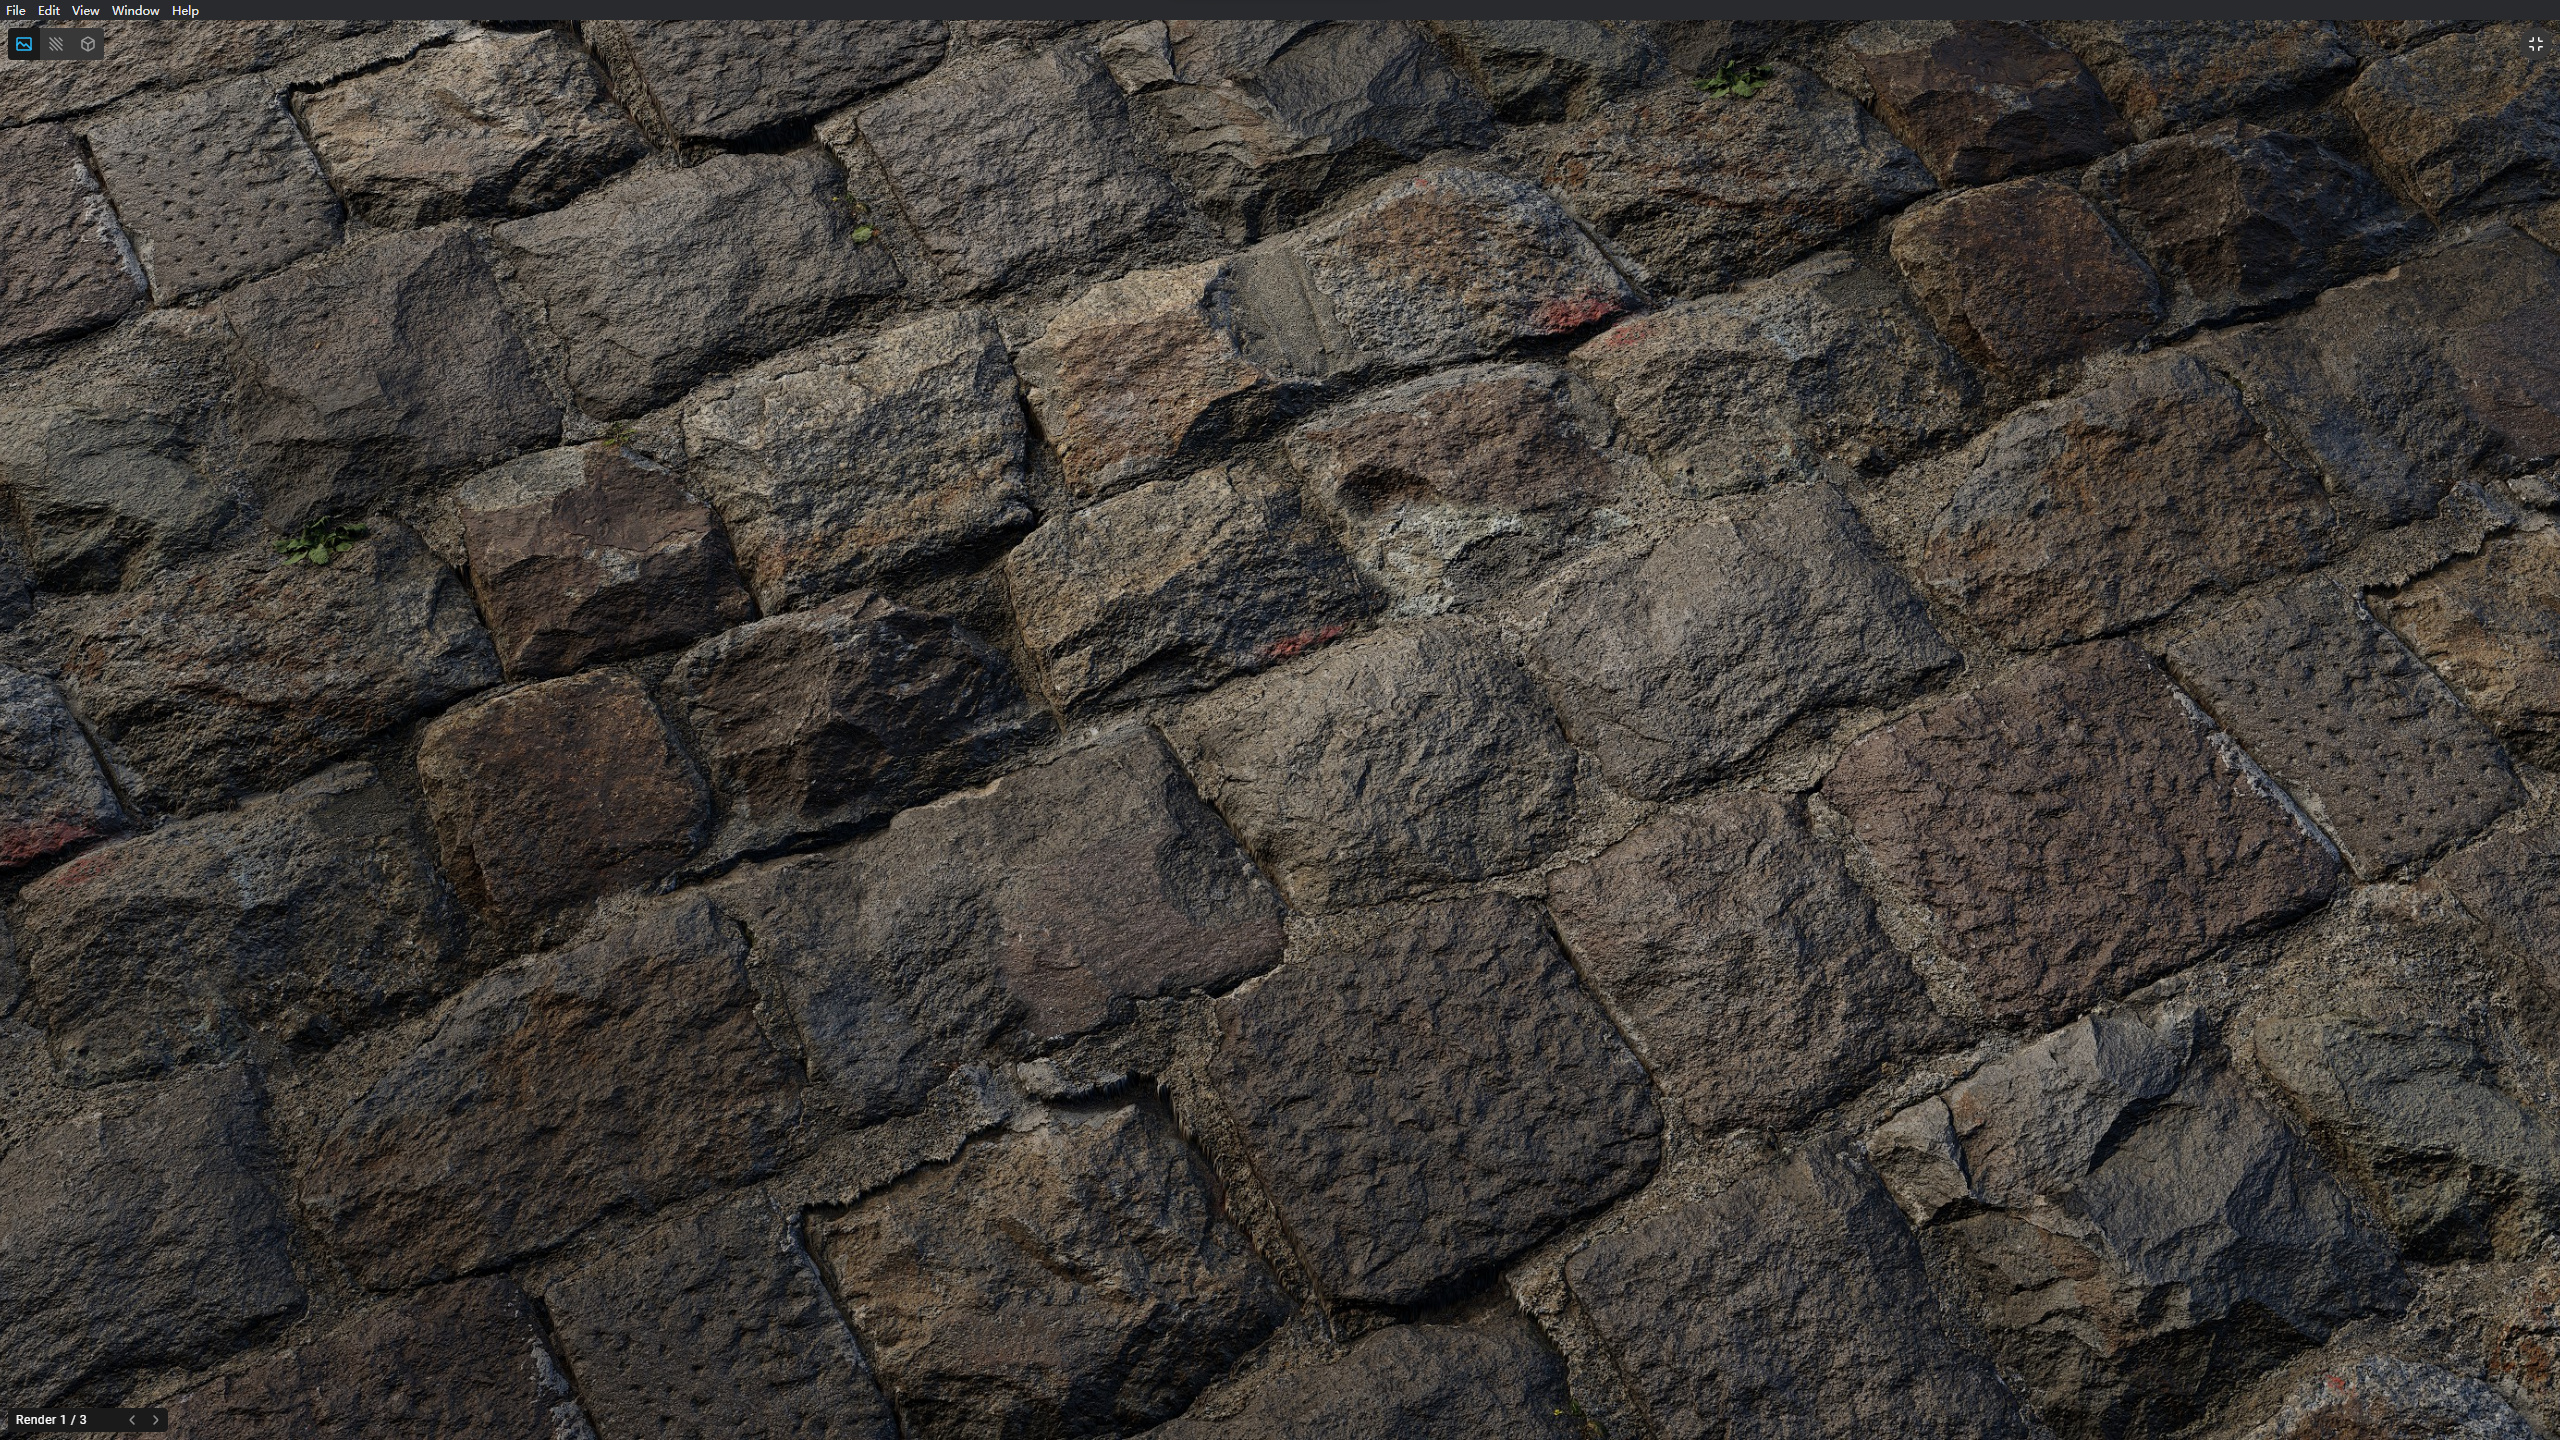
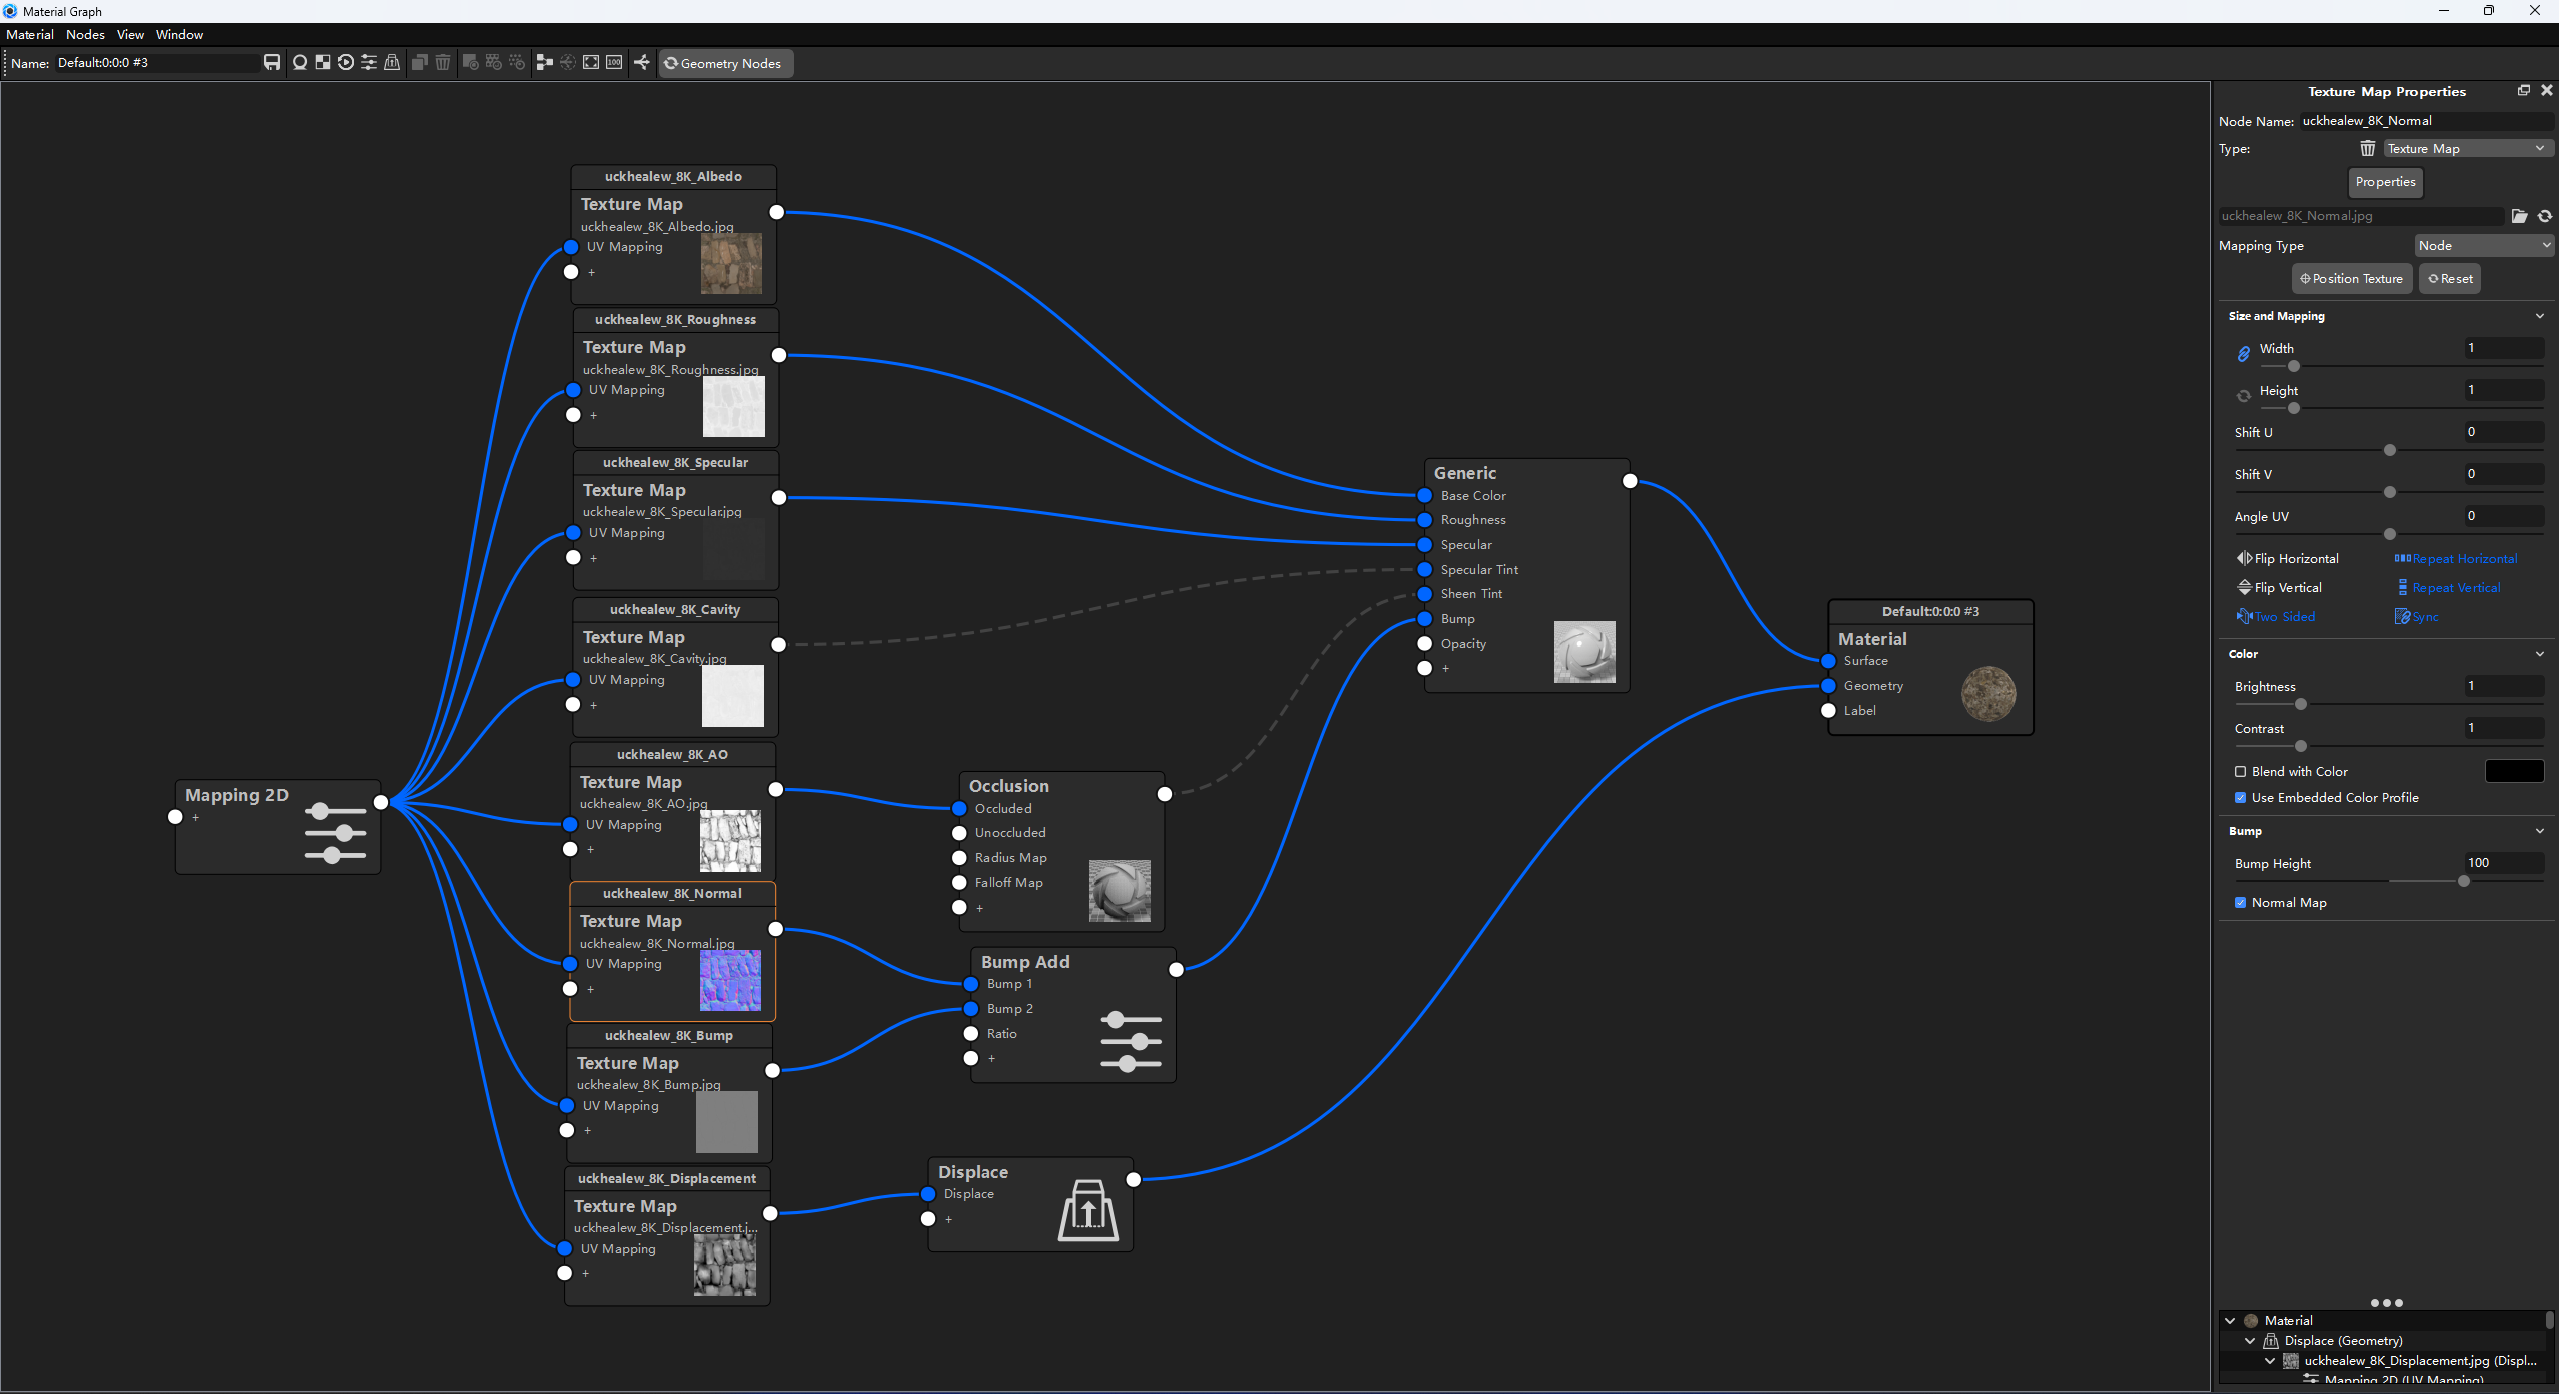
And here is the result that I rendered in the Keyshot, and the materials graph. As I downloaded 8K resolution type of the textures, it should not be like this.
The texture files are linked here:
https://drive.google.com/drive/folders/1CZ6GrqtgFTRwhYxBXUeZ2KpyzNHZdCRJ?usp=sharing
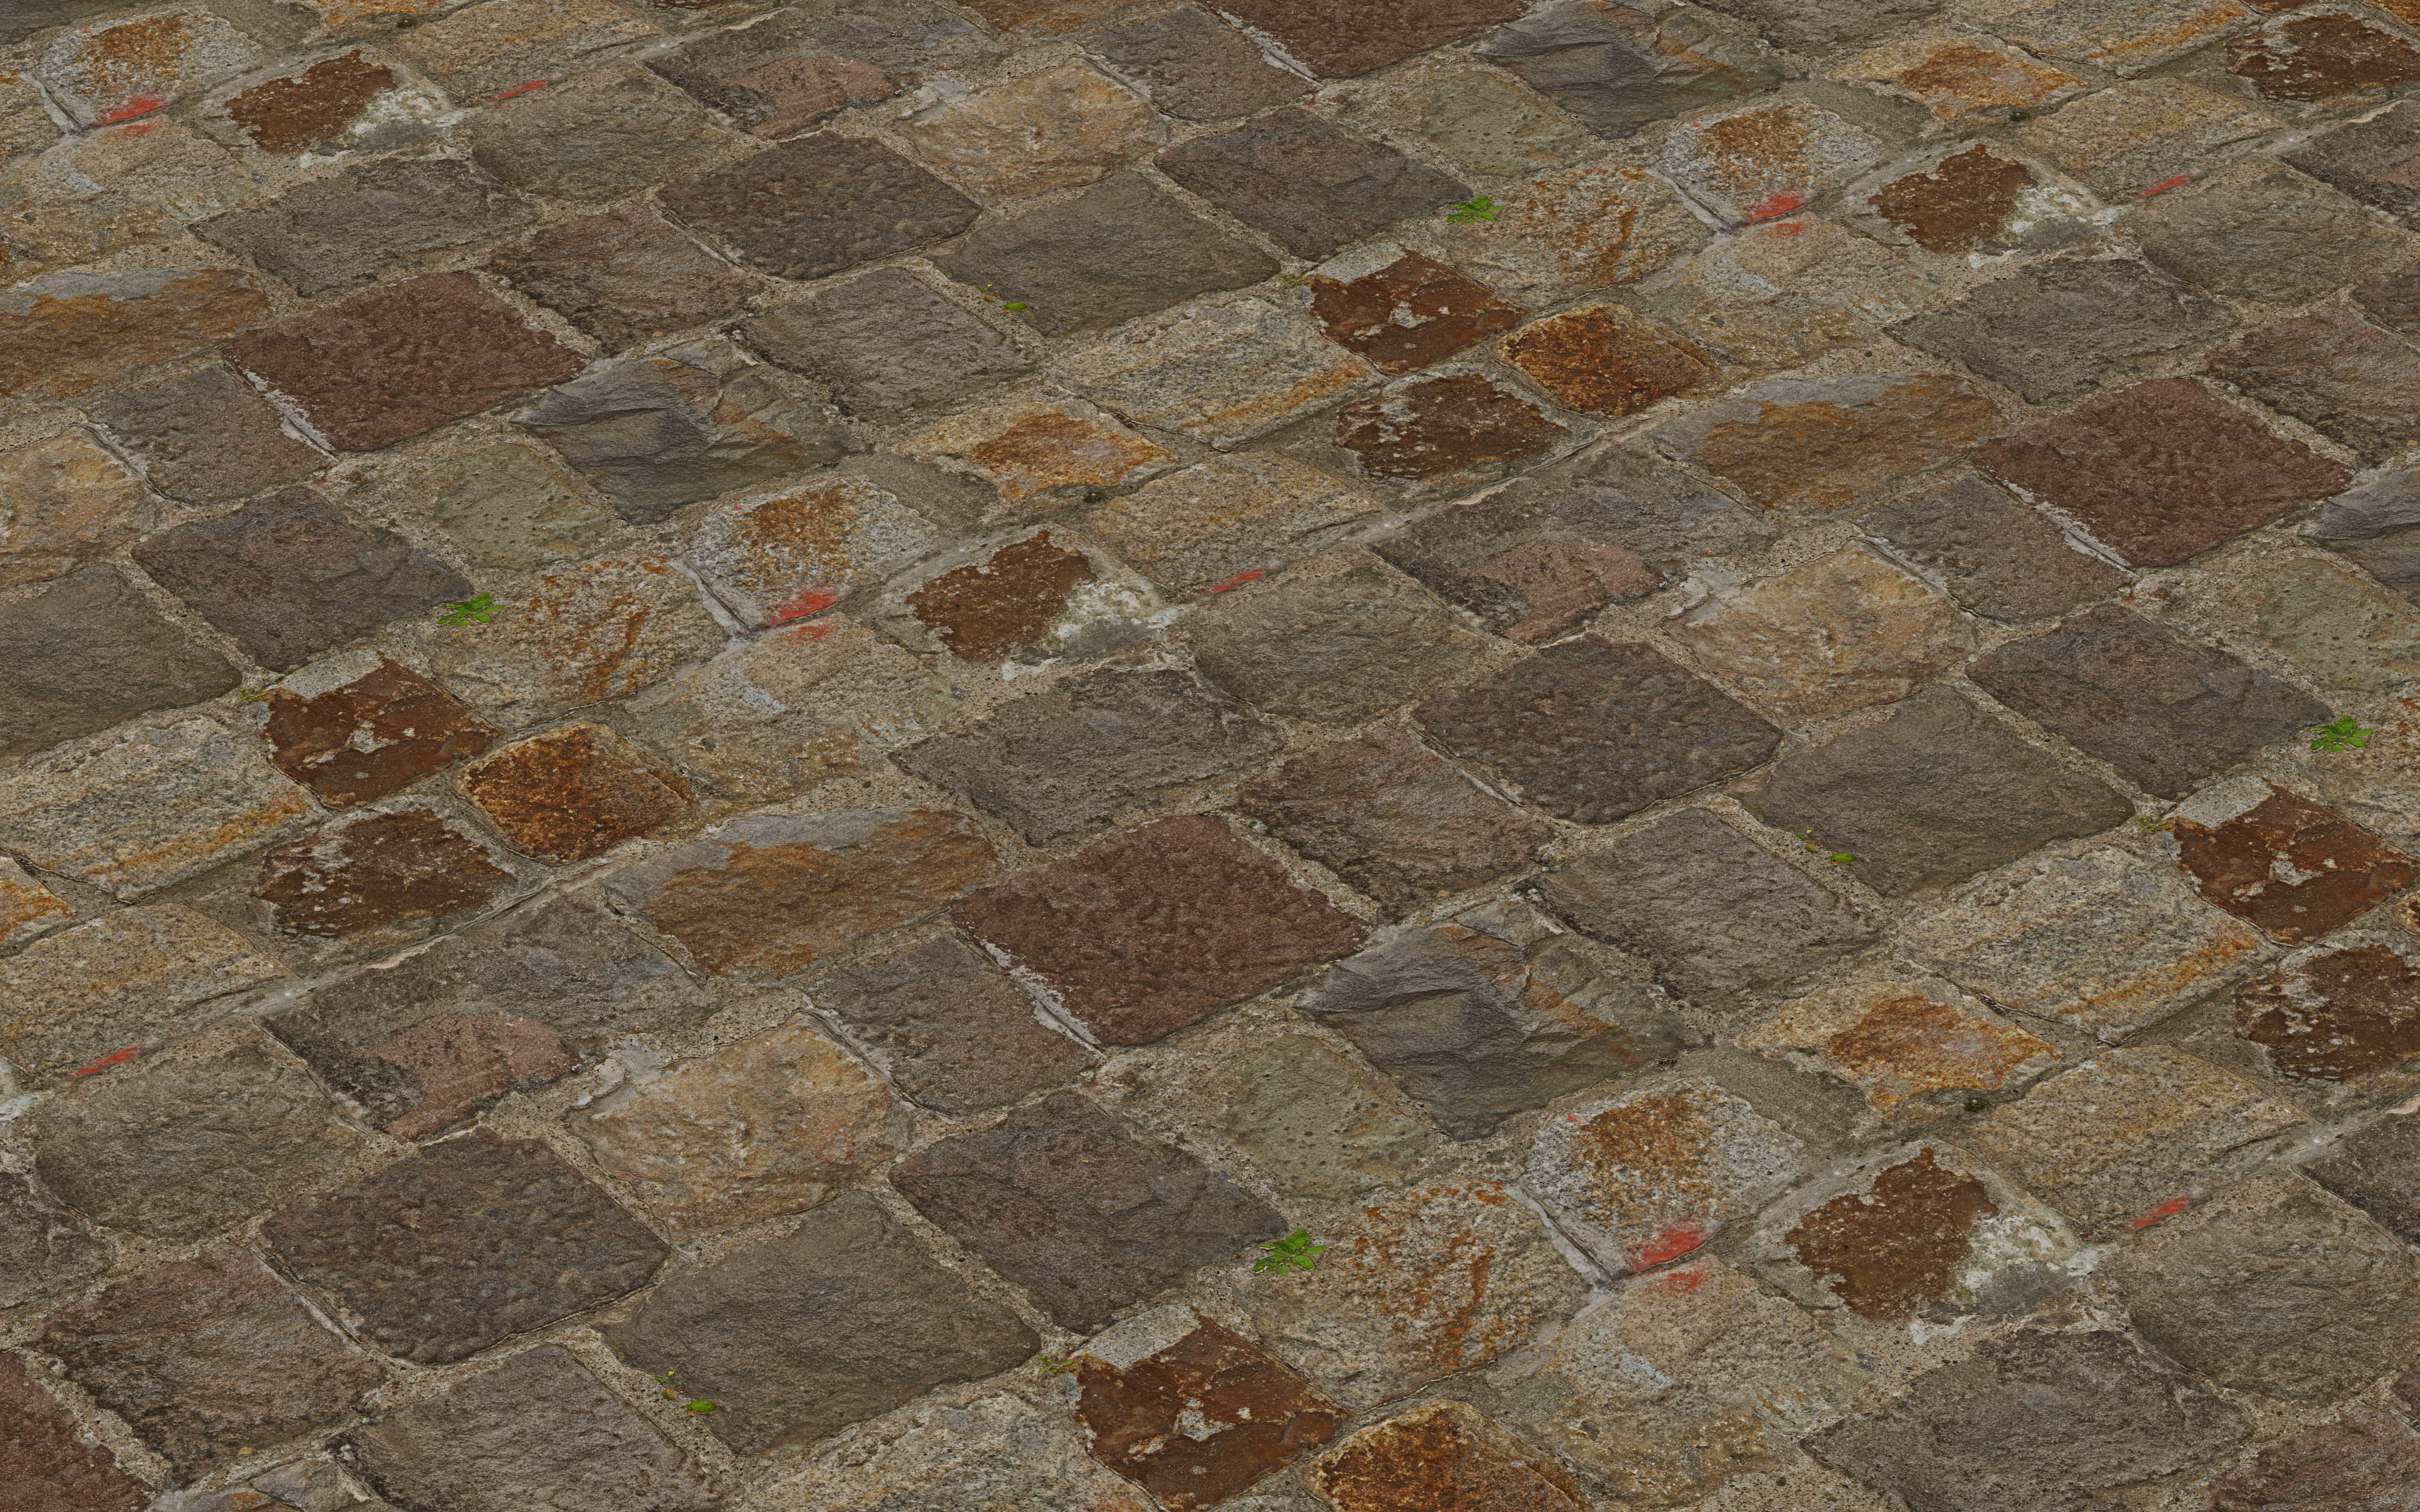
I used the same method to apply the texture map on the wall with the second materials, it got better but I was still not satiesfied with the result, either.
And here is the link of texture files:
https://drive.google.com/drive/folders/1VShdcstgoxyu5tOxofOPhKYml8DqFfJg?usp=sharing
Anyone knows what is going on here, thanks!
1 Like
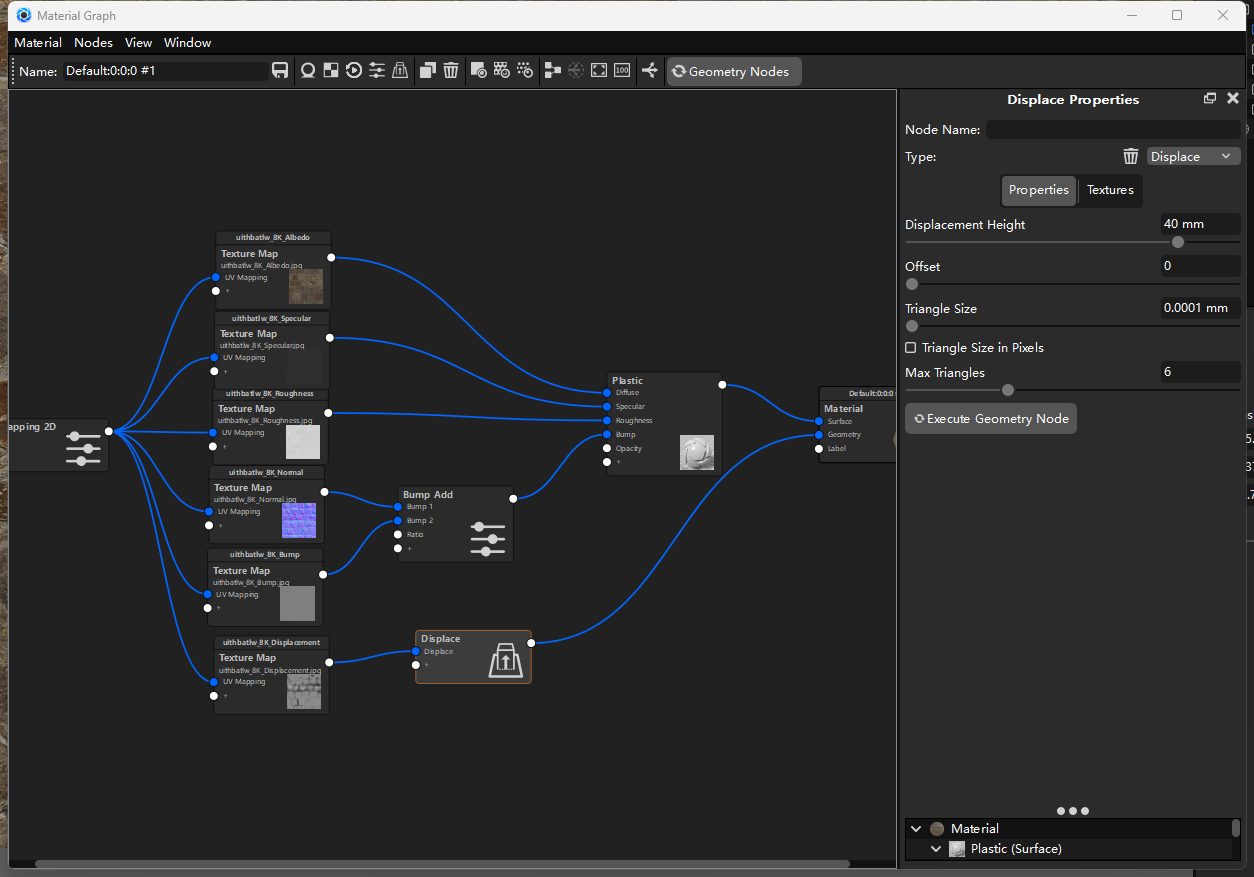
Keep the displacement values more realistic. A triangle size of what is it, picometer, is not a realistic value. What will happen is that you run into the limit of your max triangles (6 million) immediately which makes the displacement not visible.
Better just put it on 1 mm and if you see still no displacement you up your max. triangles. It’s always useful to have the headsup display on for displacement so you see how many triangles you’re at.
I think I would also remove the black/white bump and just keep the normal map. In general a normal map is more precise if I’m right and from the tiny thumbnail I think it works contra the normal map since it seems pretty equally grey.
2 Likes
Would you mind doing it on your computer? I’ve tried for a long time, but I can’t still get the precise and beautiful result as the preview in the texture files.
Hi Raymond,
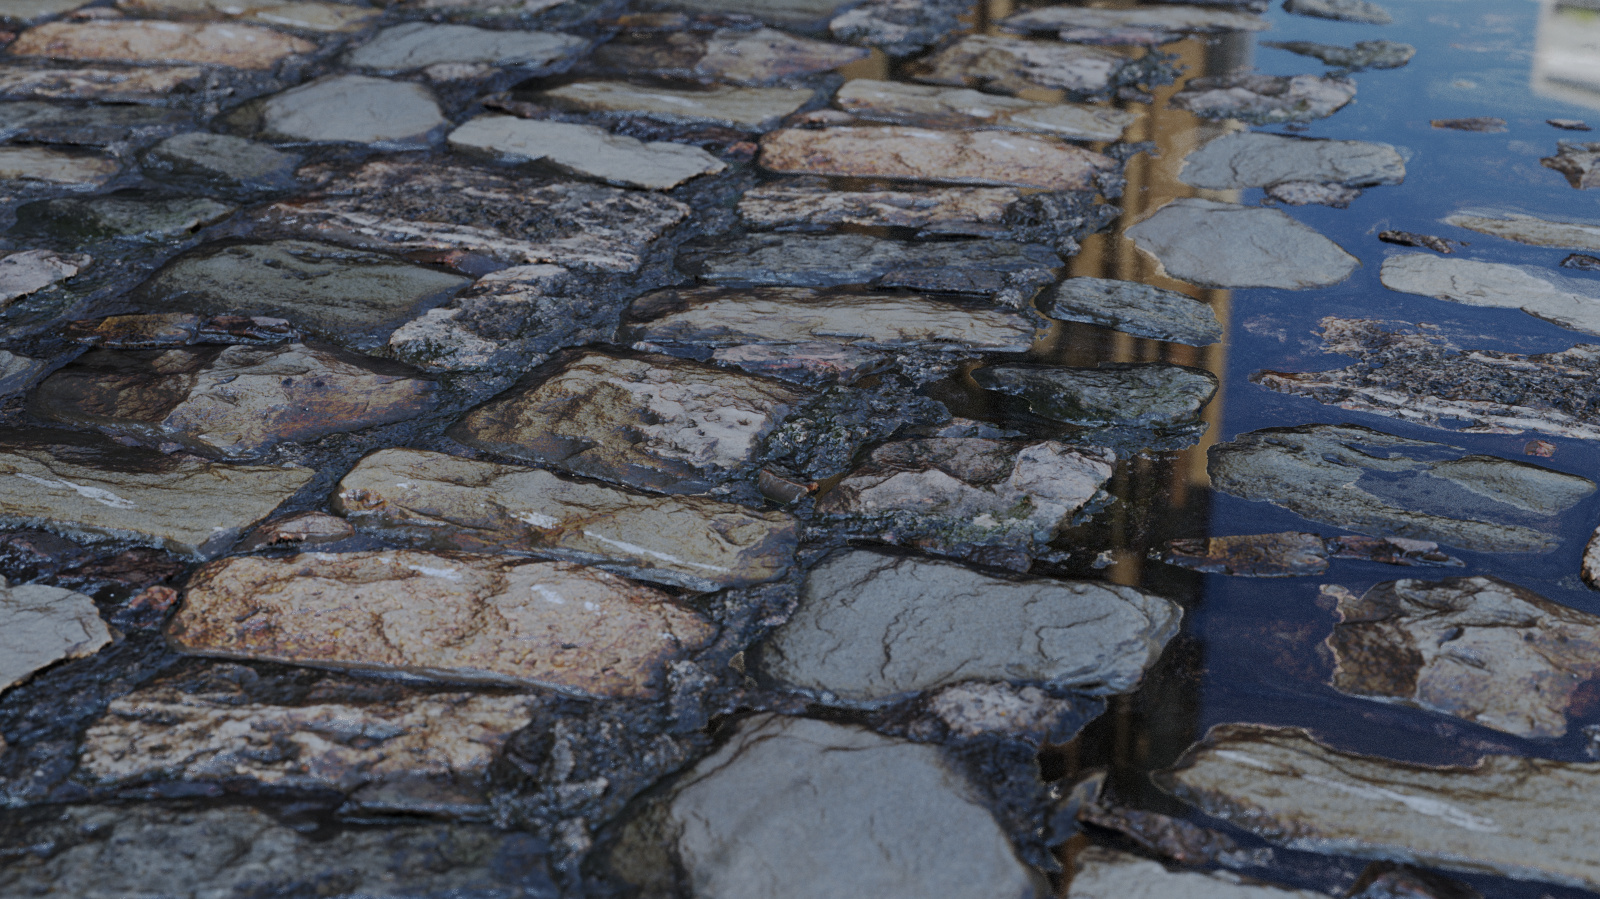
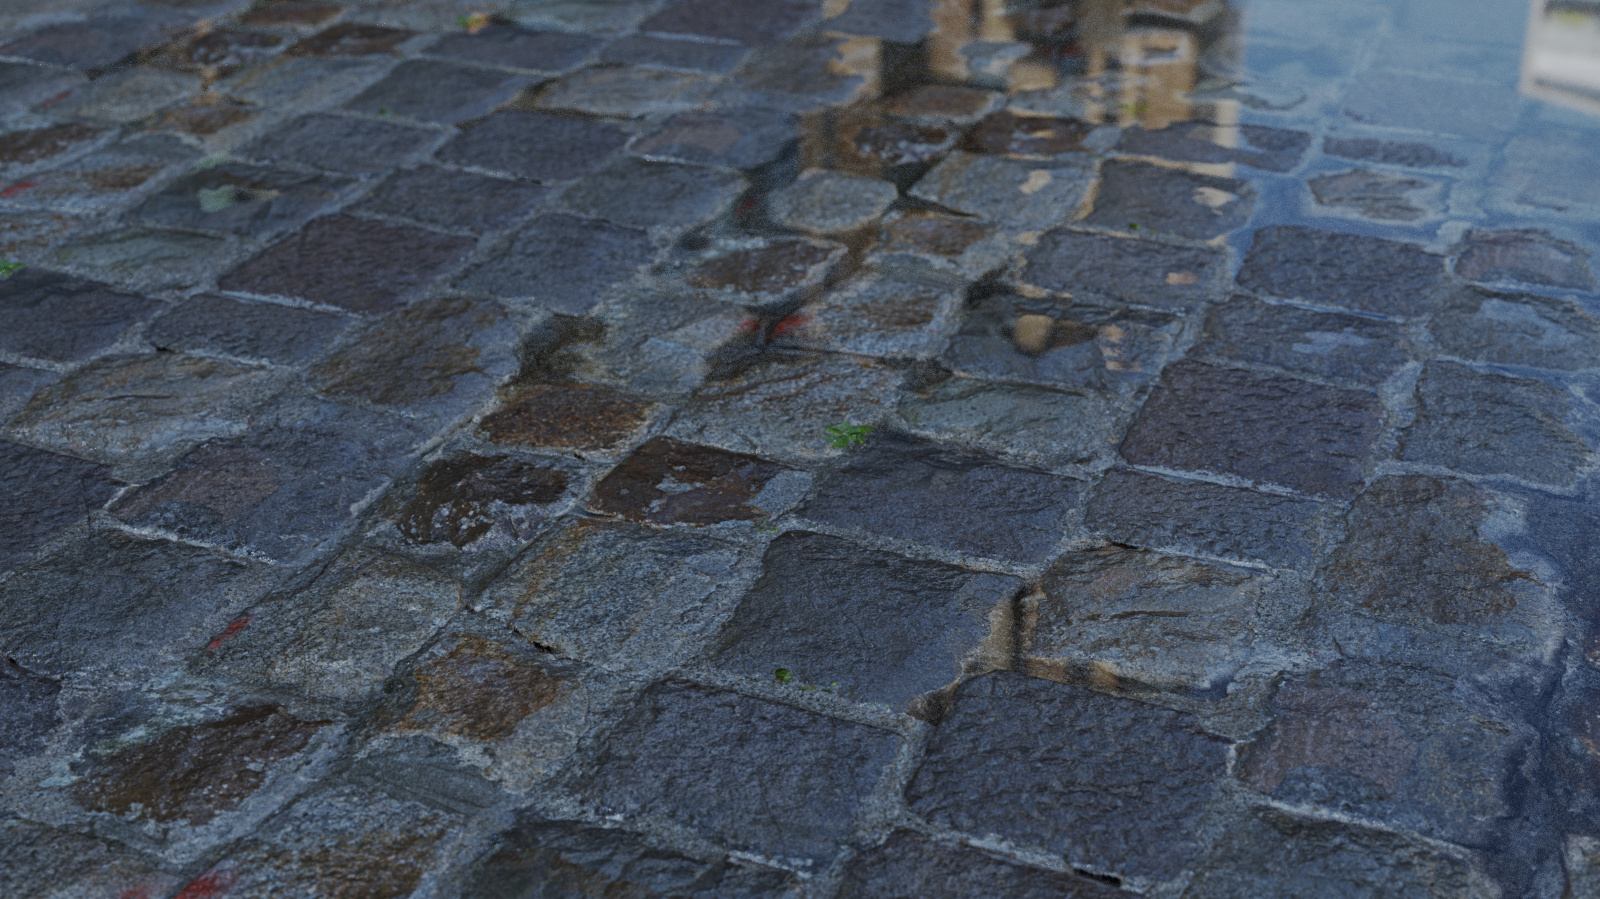
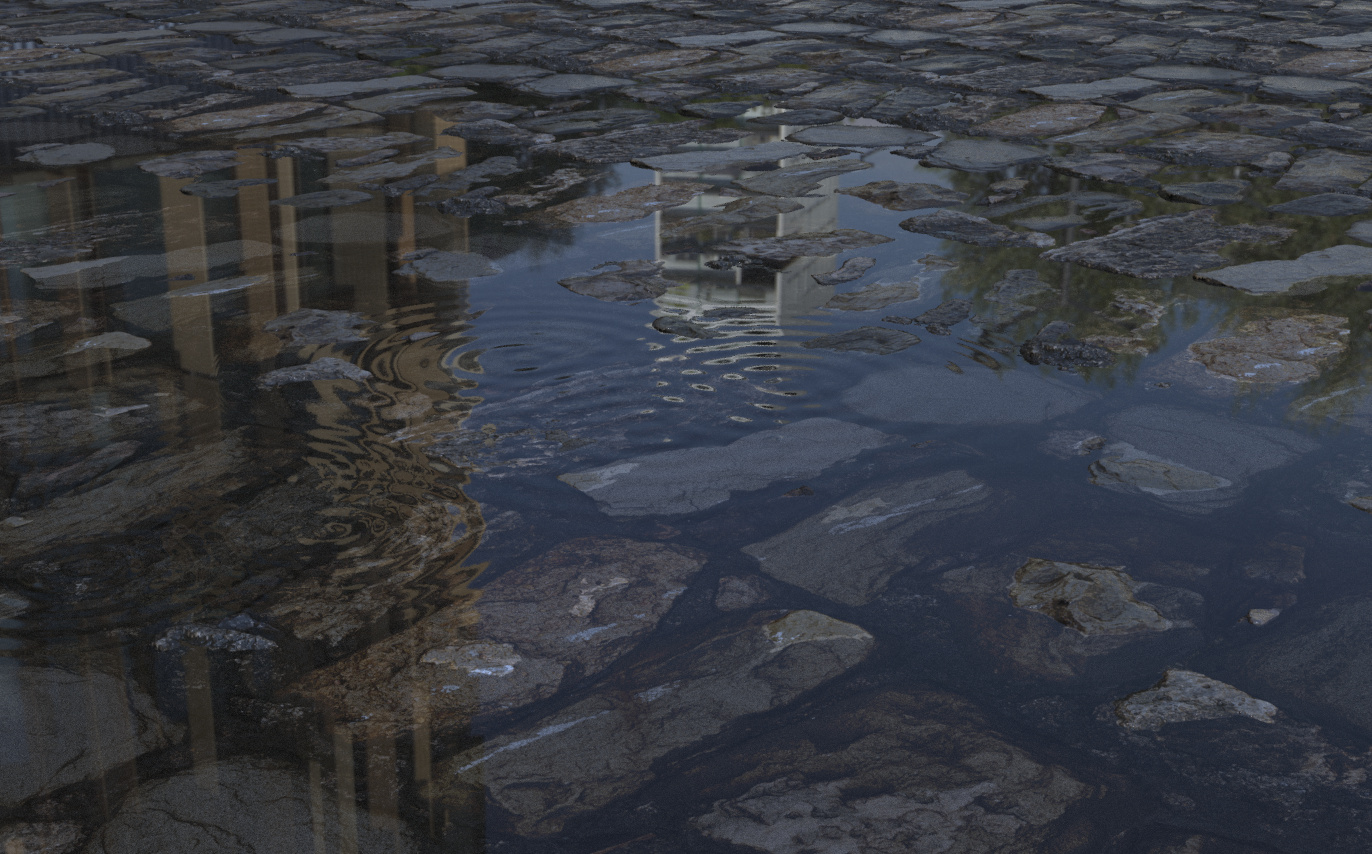
I tried a bit with the textures, it’s The Netherlands so it rained but other than that the textures are great, as always with Quixel. I do think it’s hard to use since it’s like 1x1m maybe but still nice to play with.
In one I also used the ‘cavity’ texture. I used it as an opacity for a black label. Looking at the texture I think it’s to accentuate the really dark parts where even if lights hits, not much get reflected.
I notice you try to replicate examples quite a lot while I think it’s way easier that you take them for granted but do whatever you think looks nice. I think those Quixel examples had also some post work on it which is pretty common for all renders people create. It’s also close to impossible since light makes a material looks the way it looks and you never know what they used for their example. Since I also see a shadow on the images it has more in the scene than just the stones.
I added a color adjust node in the roughness since wet stones are more glossy and that one you can use to tweak stuff.
Both KSP files are on wetransfer: https://we.tl/t-SDp3sFRuOX
The HDR is from maground.com, once in a while you can get a free HDR + Backplates with a really high resolution. They are specialized in automotive environments and for those who render cars a great source for really high quality HDR images and their backplates. /commercial break
Images below are without any POST:
BTW Renders are done with GPU but I saved them as CPU since they eat quite a lot of VRAM and not sure how much your card has.
1 Like
Wow, amazing renderings, and I tried again yesterday, it looked better than I did before, but never be good as yours, thanks for your help
Hi Oscar,
Thanks for your really awesome rendering skills, and I’ve learned a lot from your keyshot files especially like the water surface skills through the roughness pass and adding a liquid surface, thanks a lot. and another question is that I can’t handle the transparency Distance well, I linked the video at the following link, and if you have some sec to check it, I will be so appreciated for that.
Here is the keyshot file link:
And here is the video link:
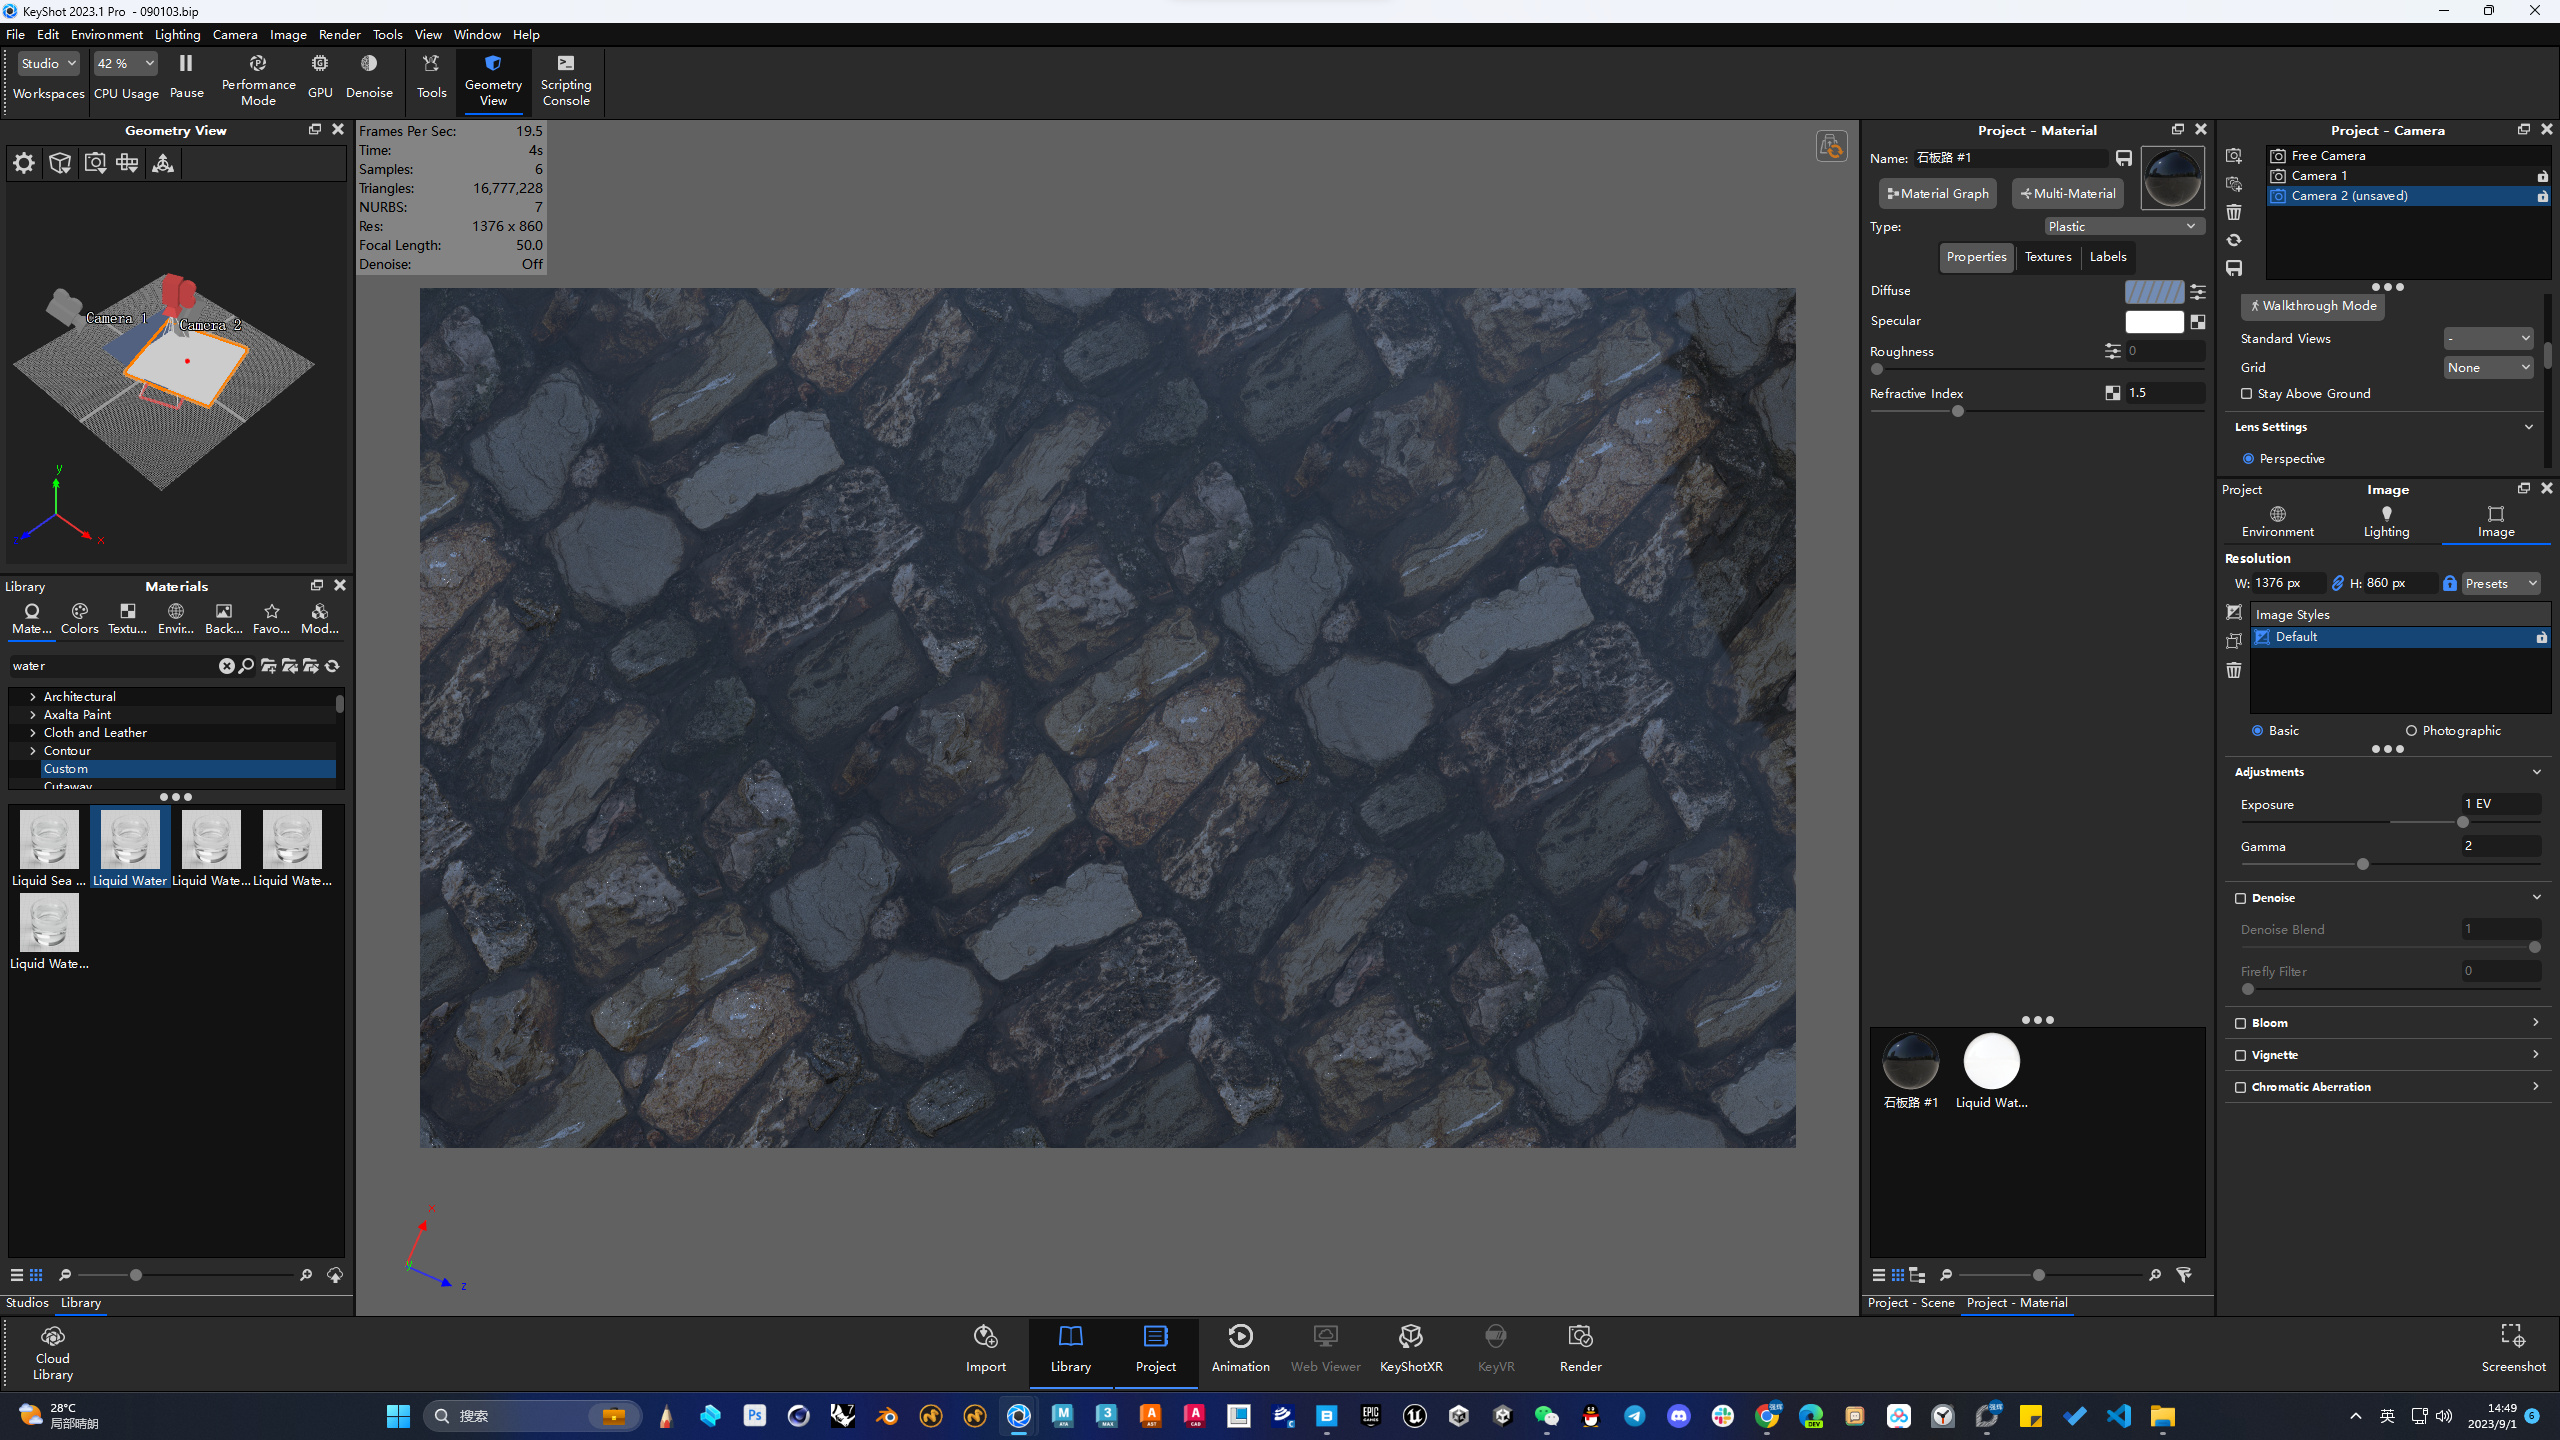
As I showed in the video when I click the scene and roll it, I can see the rocks under the water, and the feeling it expresses is really good, I really like it.
Here is the rendering when I click the button
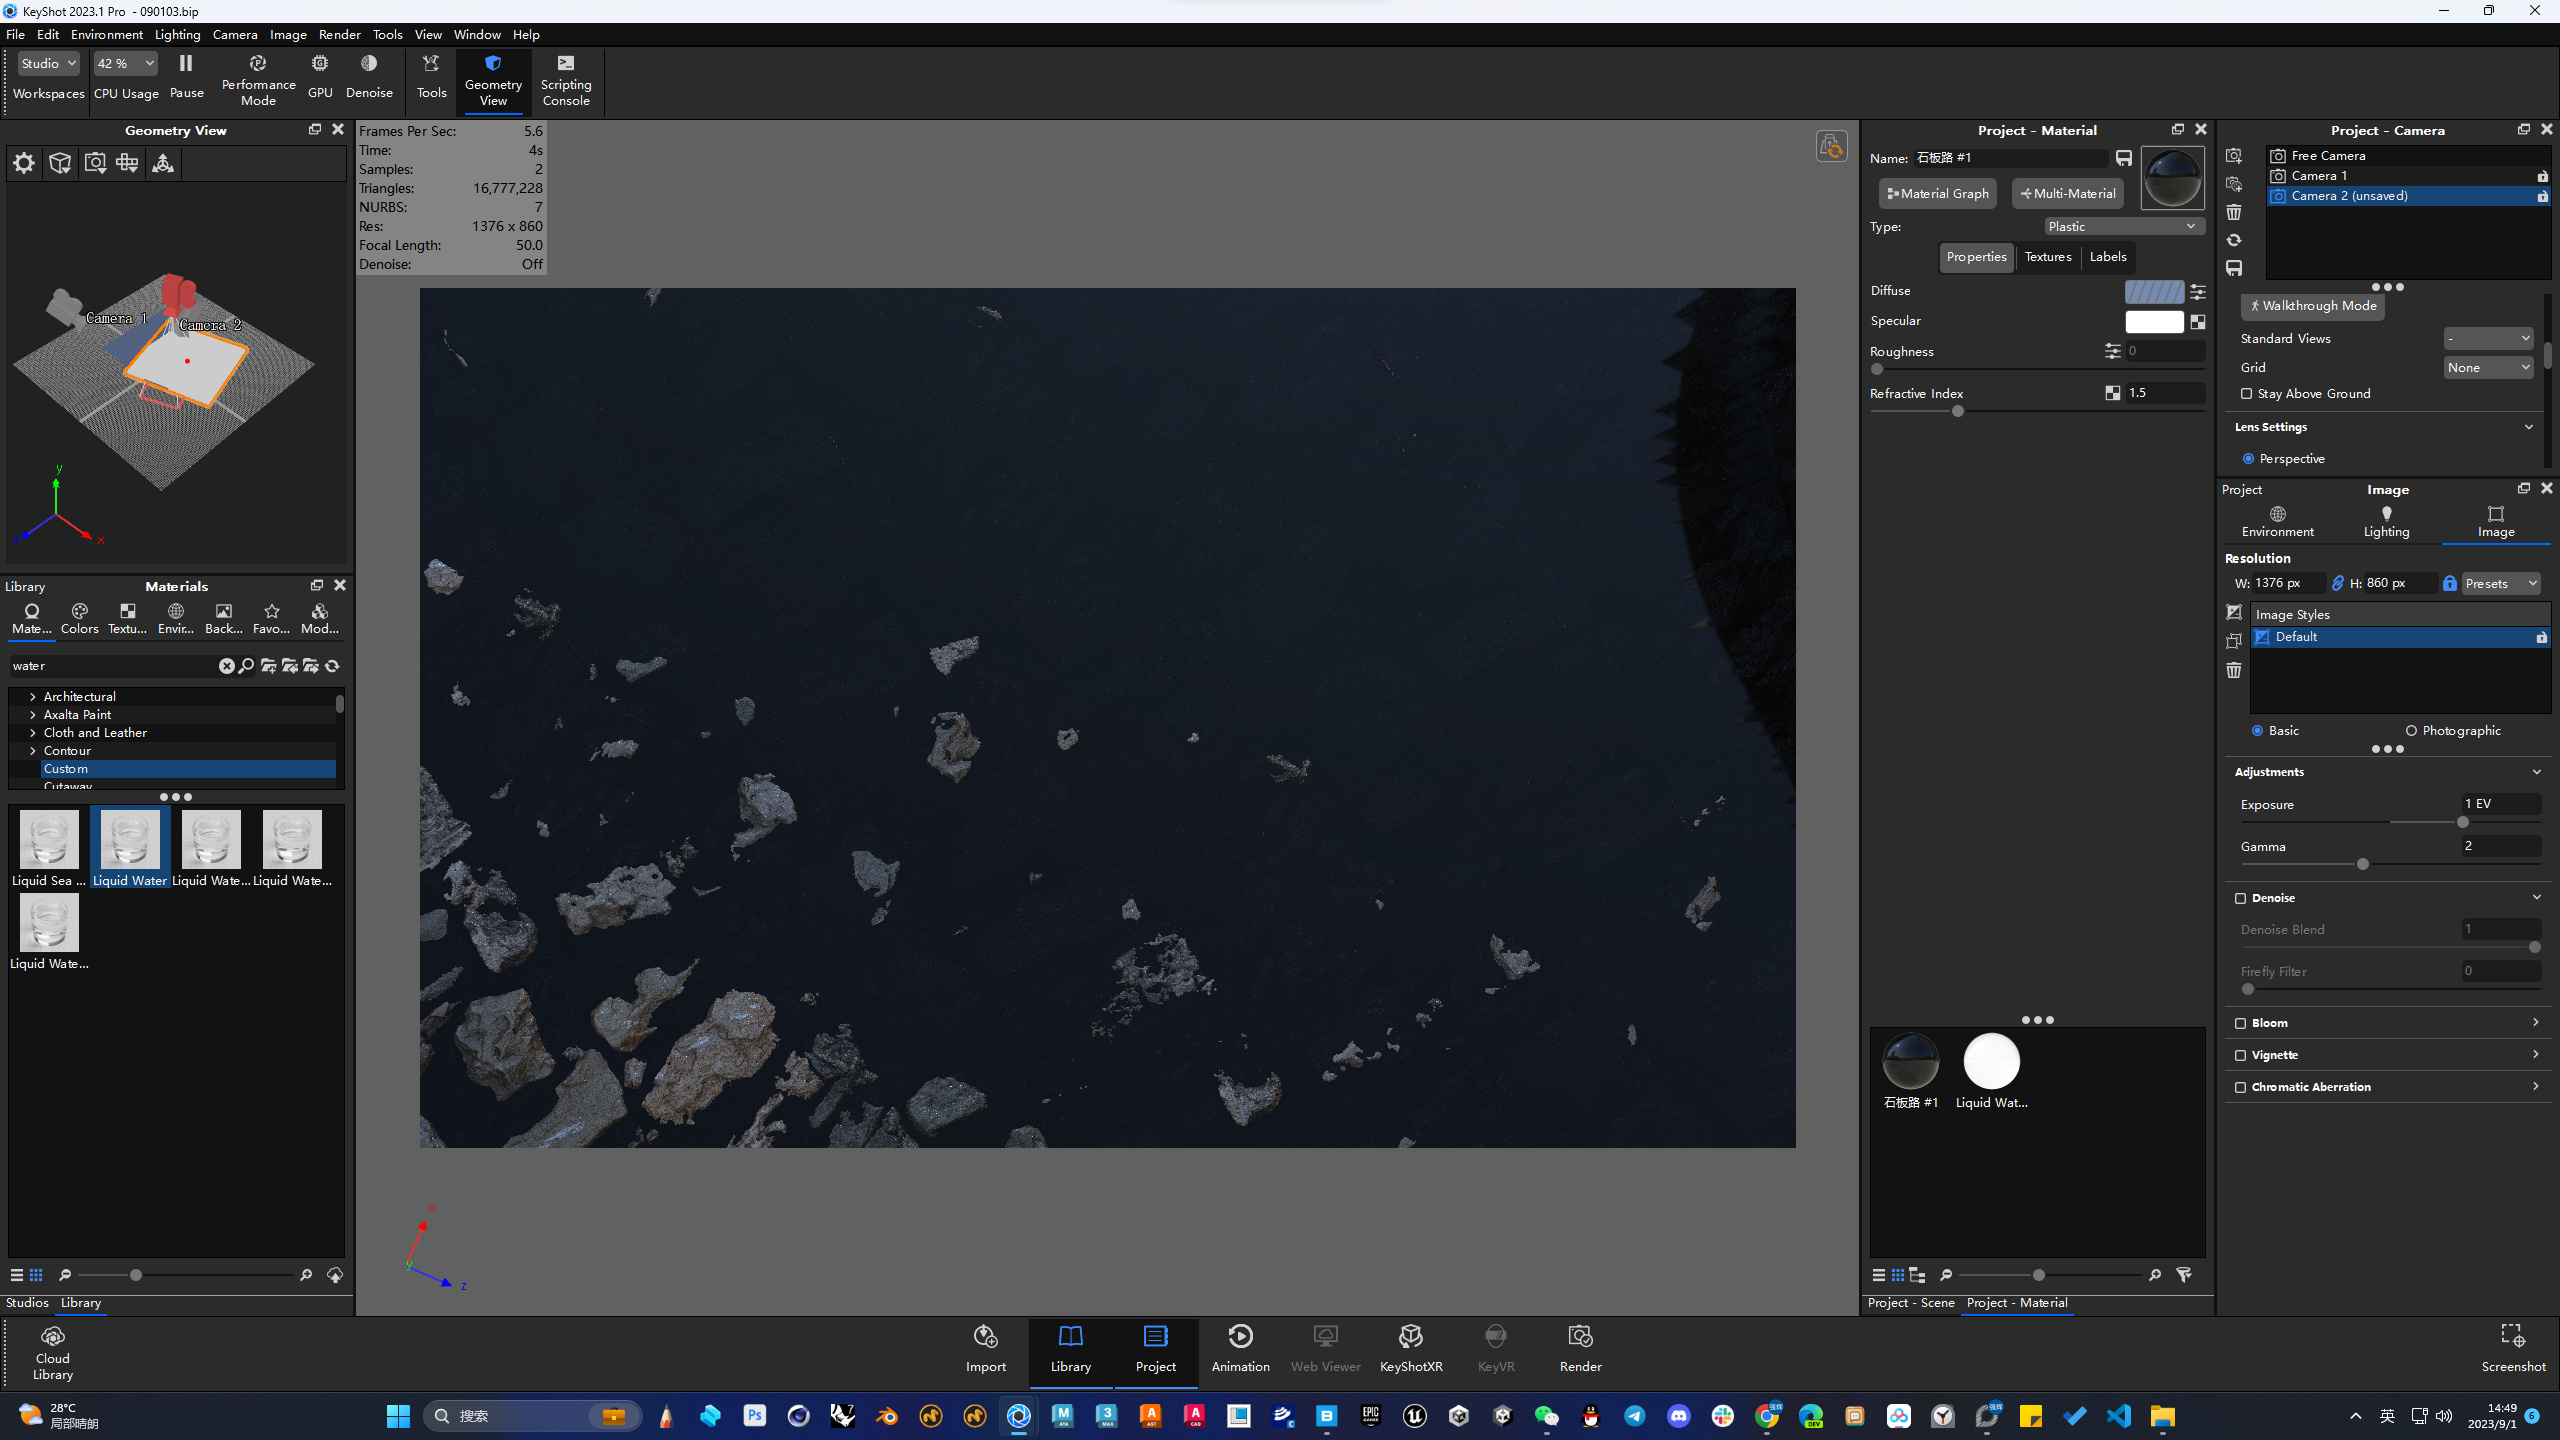
But when I released the click button, the water became darker and the rocks under the water couldn’t be seen any more, It looks a little boring to me,
Here is when I released the button
All of this happened in the CPU mode, it performed worse, or there was no any difference when you click or release the button in the GPU mode.
I hope I’ve made myself clear, anyway, thanks for your kindly reply.
Well as you see in the KeyShot files I don’t really do anything special to give it the looks, my nodes are basically just like you had them with just some different displacement settings. That’s also what I love about KeyShot, if you take your time and play with lights a bit you really get nice results without being it a real technical puzzle.
I also had the issue that it suddenly it didn’t show any displacement anymore. The older versions than would give a warning in the top right about the amount of triangles is exceeding your settings which means that it can’t make the displacement the way you want. I’ve put it on a bug list because I think it’s a warning that helps you understand why it looks the way it is.
I will take a look at your other file bit later today but I’m guessing that it’s looks how it looks because there is also no real reflection into the water. If you’ve seen the chrome video of Will Gibbons he has a point where he starts with a blank grey studio file which makes the chrome looks like boring matt grey. But that’s just because there’s nothing to reflect. If you look around you you see reflections everywhere so adding something, or an HDRI, with something to reflect helps a lot most of the time.
But I take a look, think I didn’t change anything on the liquid water material. But I used a plane so I don’t think transparency distance would make a difference. I once saw a scene where they added a plane in a bit of angle combined with displacement and it’s such an easy effect to get something look much more complicated than it is.
I noticed the problem, at first I changed the ‘water’ plane to basic glass with refractive on which looked nice (not the solid glass). So I was wondering why the ‘liquid’ made it so dark since it should look more like when I had the glass material applied.
Than I noticed your lighting settings, those were on ‘basic’. At basic it doesn’t render the global illumination you need for the light to get through transparent materials. So if you change it to ‘product’ or enable global illumination it should look good.
As you see it starts to rain again 
2 Likes
Wow, Amazing, how did you do this to make it rain, beautiful
I put two of these as a bump map on the water (using bump add). But it would actually be nicer to use a single one as a brush and use 3D paint. That way you can have small ones, bigger ones and more variation.
Actually really simple as you see but these kind of tricks and things can also can be nice tricks to have a repeating texture less obvious by masking it with some changes. Quixel has for example also 3D models like leaves/branches etc and if you just drop a few of those somewhere a repeating texture gets way less obvious.
Not sure if you can use those 3D models easy in KeyShot though, of if it’s actually allowed. I know you can use them free for Unreal Engine but not sure if you actually are allowed or can use those outside the UE environment.
1 Like
Yes,Quixel is free to Keyshot and Blender, and what you mean about 3D painter is about Photoshop?
No I meant the 3D paint feature in KeyShot. If you have a texture with one circular bump map you can use the 3D Paint mode in KeyShot to just put it a few times on the ‘water’ using the 3D paint options ‘stamp/stencil’ mode. That makes it easy to change size and opacity so you get more variation in the ripples in the water compared to the way I did it.
1 Like
Yes, I’ve found it, thanks!